How to trim a video on a Mac without re-encoding
Cut the start, the end or the middle out of a clip and keep the original quality. What a lossless cut is, where it can start, and three ways to make one on a Mac.
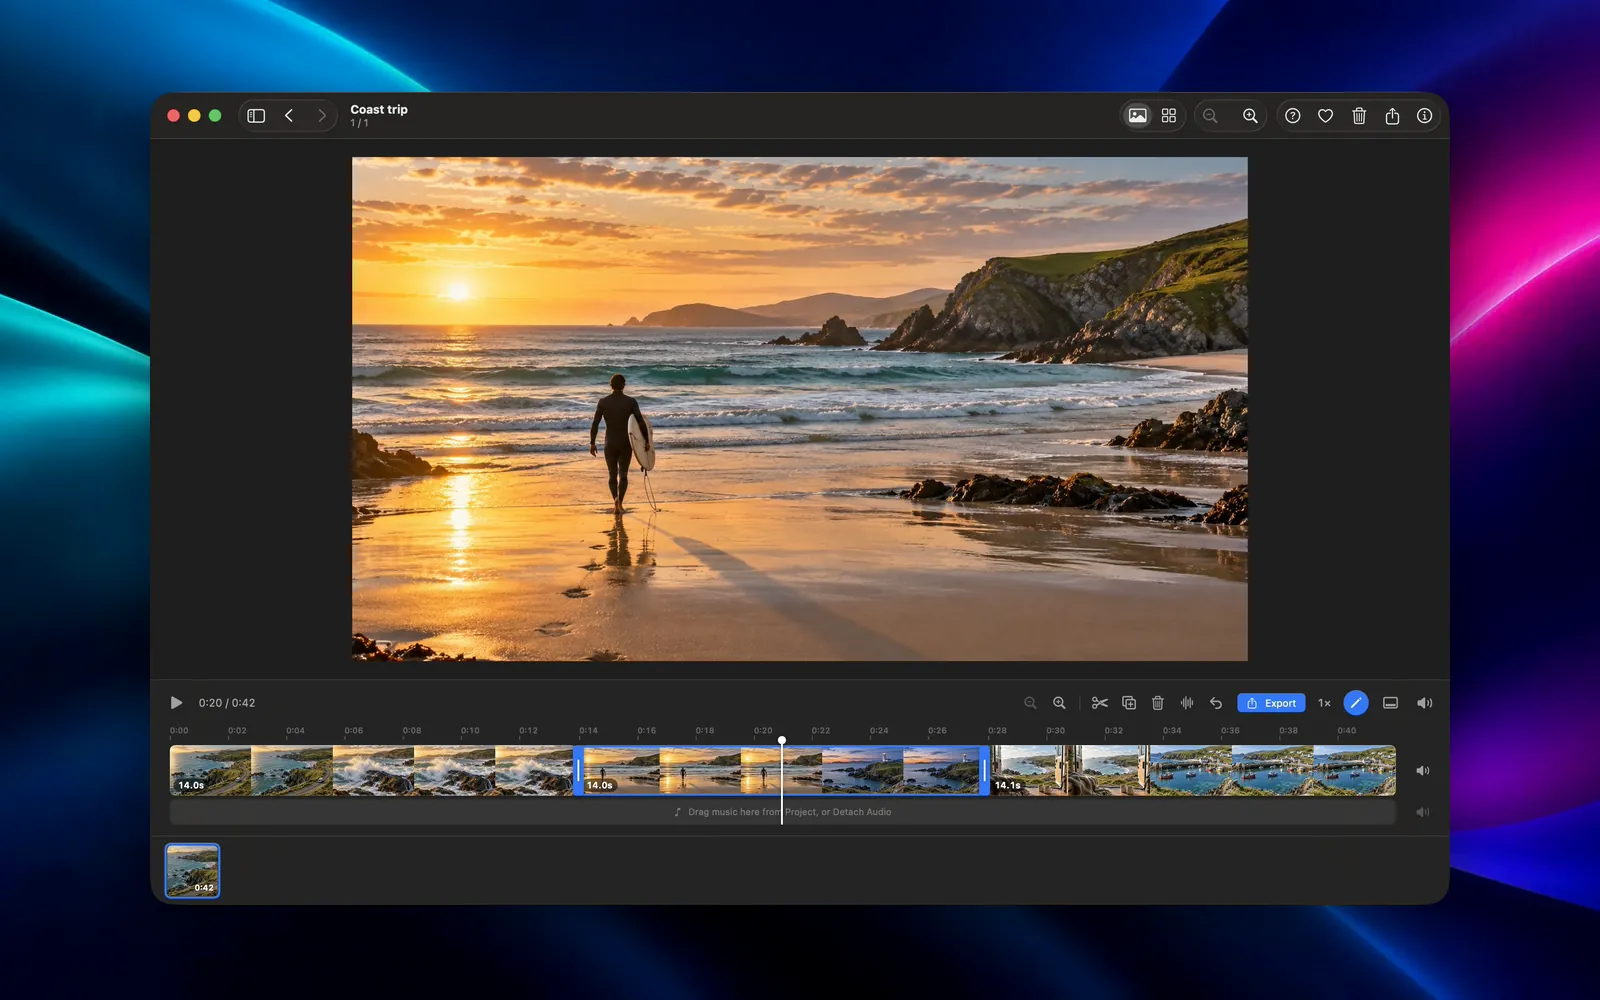
You shot four minutes on your phone, and the part you want is 40 seconds in the middle. Most editors will cut it for you and then spend a minute rendering a new file that looks a little softer than the original. For a simple trim, you can skip the render and keep the file exactly as it was shot.
What re-encoding is, and why you’d skip it
A video file stores compressed frames. When an app re-encodes, it decompresses every frame and compresses it again. That takes time, and because the compression is lossy, each pass throws away a bit more detail.
A trim without re-encoding (also called a lossless cut, stream copy or passthrough) copies the compressed frames you keep into a new file as they are. The frames are byte for byte the ones in the original, so the quality can’t drop. Saving takes seconds even for 4K, since nothing gets rendered, and the codec, resolution, frame rate and HDR all stay as they were.
Where a lossless cut can start
Compressed video doesn’t store every frame in full. Some frames, called keyframes, are complete pictures. The frames between them only store what changed since the last one, so they can’t be shown without the keyframe before them.
That means a lossless cut can only start cleanly on a keyframe. Ask for a start point between two keyframes and the cut either snaps back to the earlier keyframe or the first moment plays oddly. On most phone and camera footage the keyframes are close together, so you lose or gain a fraction of a second, which rarely matters for a clip you’re about to share. If the start has to be exact to the frame, it has to be re-encoded.
Option 1: QuickTime Player
QuickTime comes with every Mac and is fine for taking a bit off each end.
- Open the video in QuickTime Player.
- Choose Edit › Trim (⌘T).
- Drag the yellow handles to the start and end you want, then click Trim.
- Save the result.
QuickTime doesn’t tell you whether it copied the video or re-encoded it. You can remove a piece from the middle with Edit › Split Clip, delete the piece and save, but past one or two cuts it gets fiddly.
Option 2: ffmpeg, from Terminal
If you’re comfortable in Terminal, ffmpeg makes a stream copy with -c copy. Install it with Homebrew (brew install ffmpeg), then run:
ffmpeg -ss 00:01:20 -i input.mp4 -t 45 -c copy output.mp4This starts at 1 minute 20 seconds, keeps 45 seconds and copies the streams unchanged. The start lands on a keyframe, as described above. To take a piece out of the middle, you export the two parts you want to keep and join them with ffmpeg’s concat feature, which reads a text file listing the parts. It works, though you won’t want to do it for every clip.
Option 3: Galance
Galance is a Mac app for going through folders of photos and videos, and it has a timeline editor for cuts like this one. We make it, so weigh this section accordingly.
To trim a clip:
- Open the folder with the video and select it.
- Press ⌘E (or Return) to open it on the timeline.
- Move the playhead to where you want a cut and press C to split there. Do the same at the other end.
- Select a piece you don’t want and press Delete. You can also drag the edges of a piece to trim it, or drag pieces to reorder them.
- Press ⇧⌘E to export.
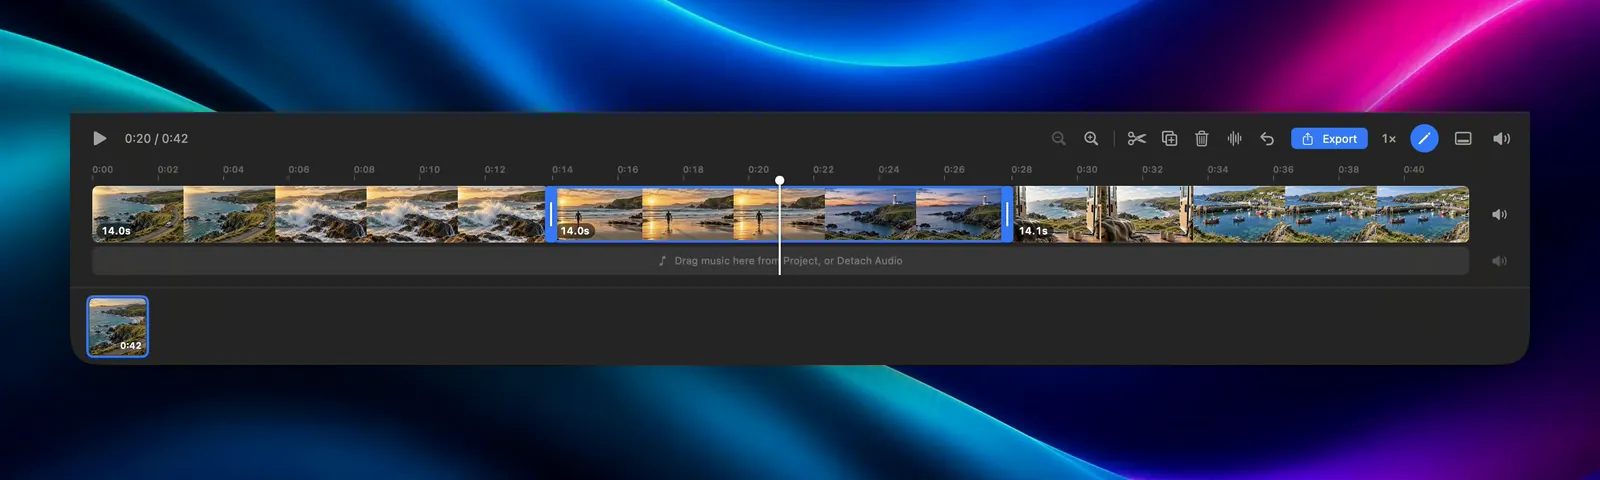
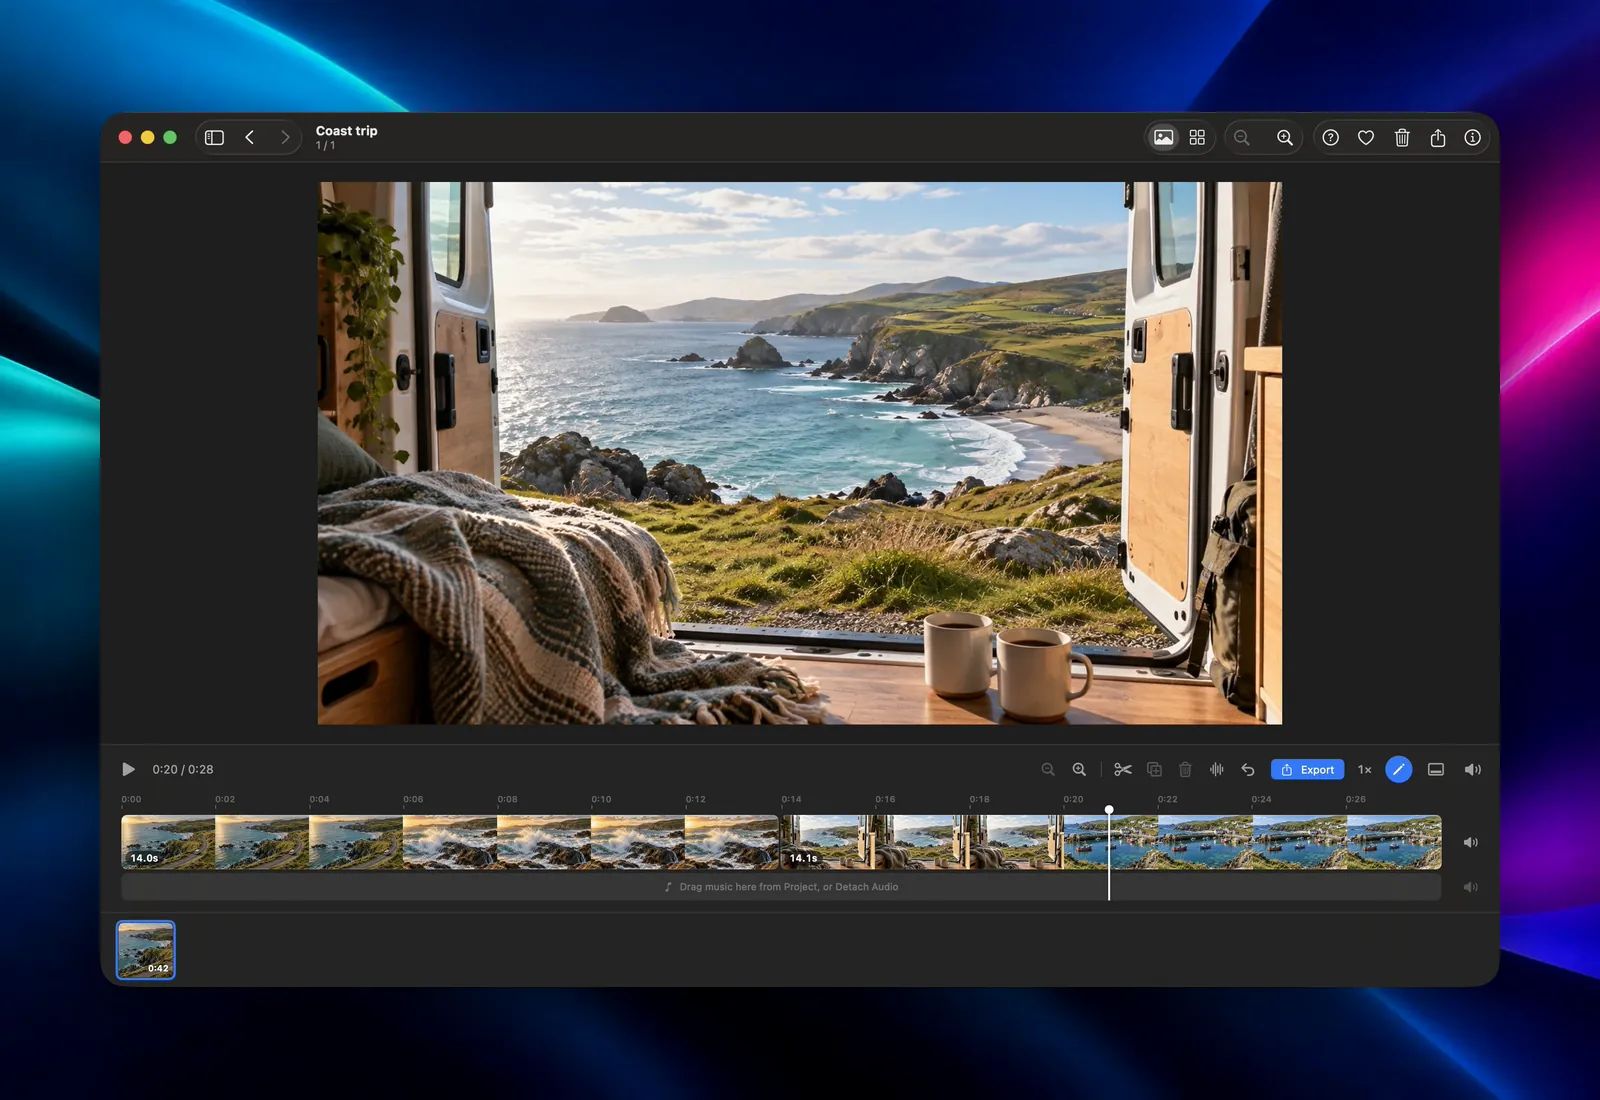
The export is a new file named “name (edited)” in your destination folder, which is a “Liked” folder inside the folder you opened unless you chose another one. The original is never changed, and ⌘Z undoes the export too.
Galance skips re-encoding whenever every piece comes from the same video and you haven’t added music or detached the audio. Cutting the middle out of a clip still counts. In the example above, Galance saved the 28-second, 1080p result in under a second, still H.264 at the original resolution. Once you add music, or mix in a second video or a photo, Galance encodes one new file at the highest quality, because sound and pictures from different sources have to be rendered together.
Saving one part as its own clip
Sometimes you want to keep the whole video and also save a short piece of it. (For turning one video into several clips, see how to split a video into clips on a Mac.) Select the piece on the timeline and choose Video › Save Segment as Clip, or Save Segment to Folder… (⌥⌘S) to pick where it goes. The clip is named after its times, like “IMG_0412 (1.20–2.05).mov”.
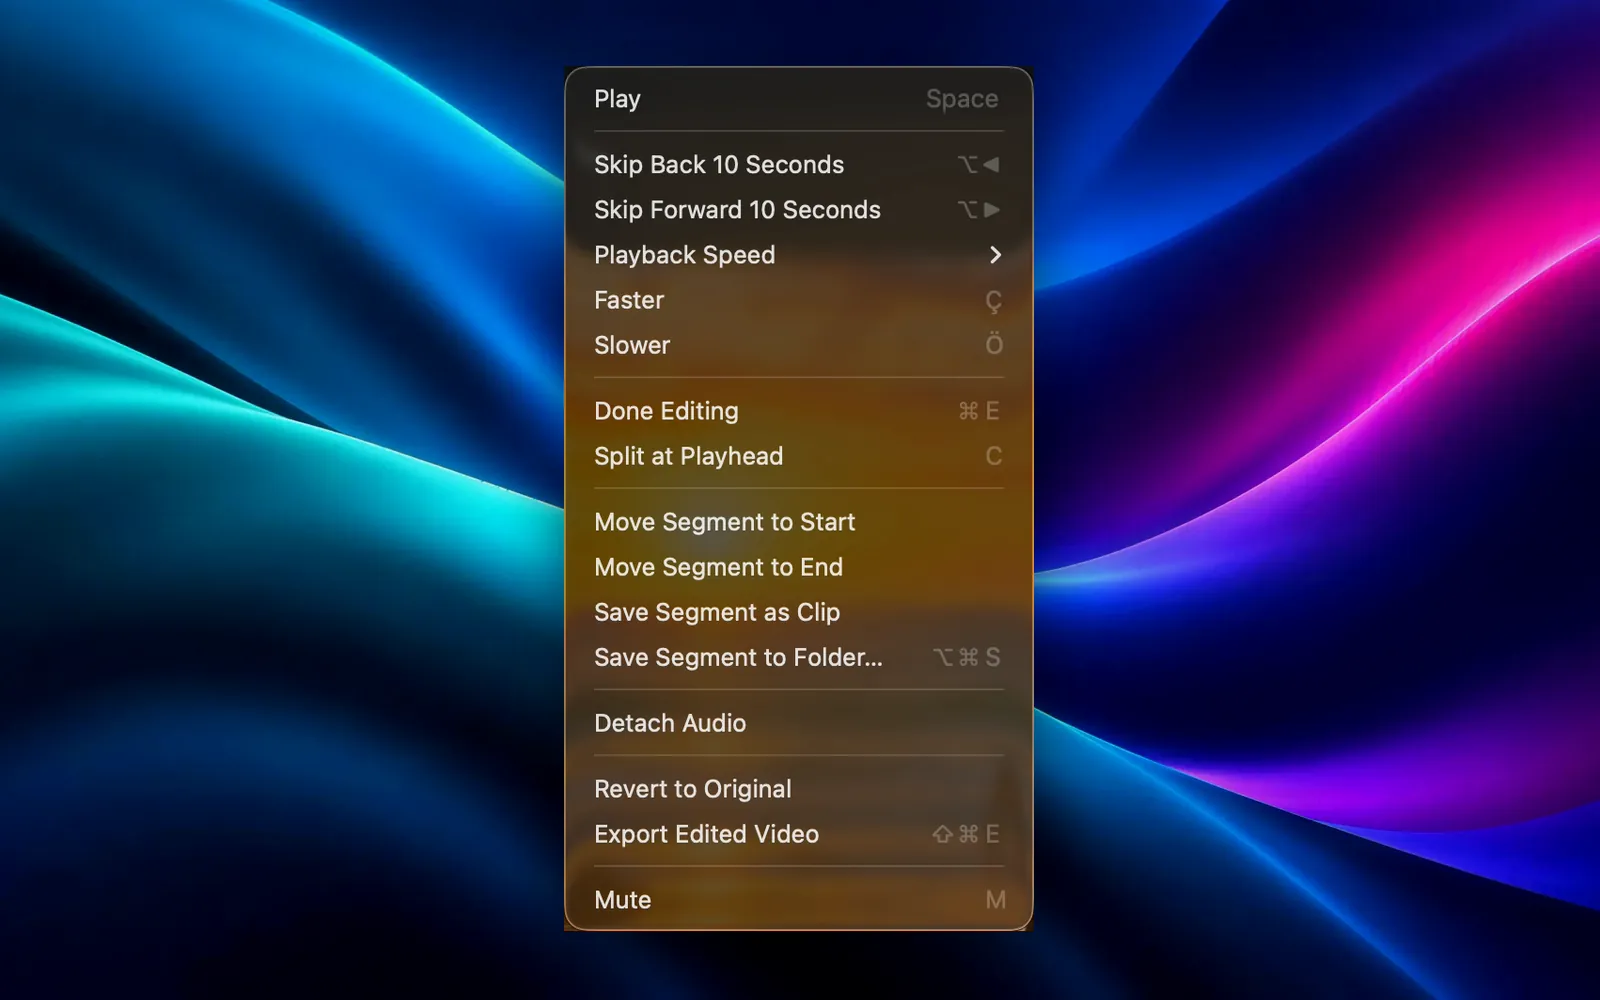
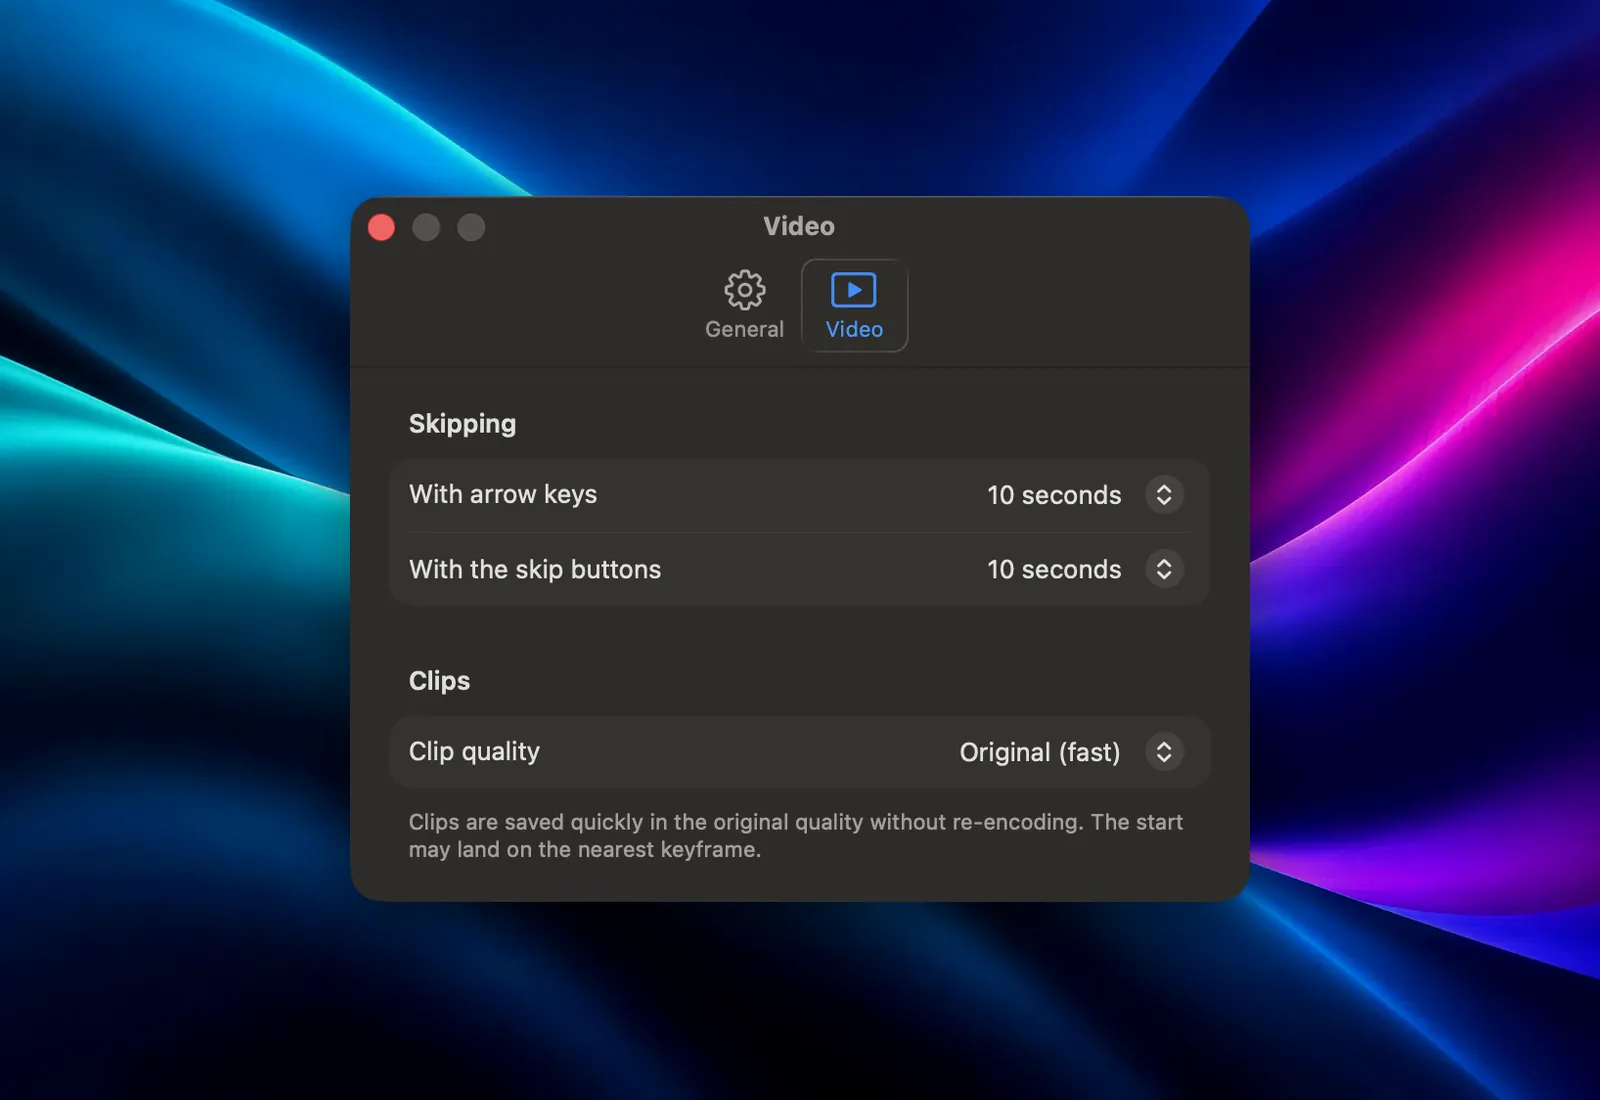
Clips are saved without re-encoding by default, so their start may land on the nearest keyframe. If you need them exact, go to Settings › Video › Clip quality and choose Frame-accurate. Galance then re-encodes each clip so it starts on exactly the frame you chose, and saving takes longer.
Which one to use
For one quick trim at the ends with nothing to install, QuickTime Player is enough. For scripts, batches or a server, use ffmpeg with -c copy. Galance makes more sense when you’re cutting pieces out of the middle, saving several clips from one video, or trimming videos while you sort through a folder of photos and footage.